Thursday, December 31, 2009

BodgeIt broke on Boxing day and was taken to Hospital.


On Boxing Day my heart decided to lose sync with its other half so for 30 minuets it was ticking along at  225 beats per min. Thus I have had a very interesting 5 days in hospital. Ive been diagnosed as having PAROXYSMAL SUPRAVENTRICULAR TACHYCARDIA (PSVT) this condition is resolved with asprin and beta blockers and is generaly not life threatening just feels like it is at the time of an attack.

I will continue with the Mendel build as soon as I can next year ~ there not being much of this year left now. Happy New Year to every one.

Thursday, December 24, 2009

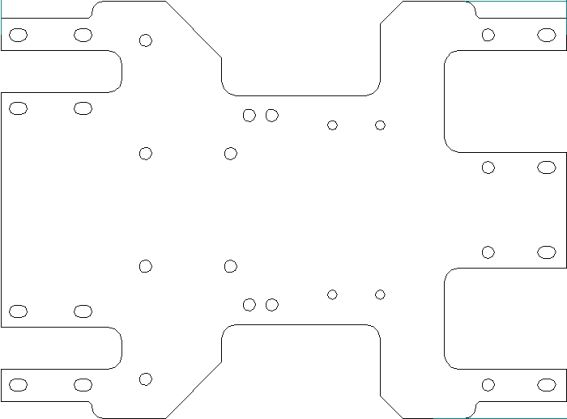
Mendel stand / base board to keep it neat and transportable


Making a Mendel stand / base board to keep it neat and transportable.

It is not a necessary part for Mendel. I think it might make it easier to square Mendel up. As I am not using belt for the Z axis  my steppers hang down an by an extra 16mm.

I need Mendel to be easily transportable so it can be picked up like a portable sewing machine set up and put away. Using a base board will keep it square and save from the odd knock. I know its a little Belts and Braces once its nicely set up working, I don't want to have to realign it every so often after its been moved.


The base board I've used is 18mm Ply but could be OSB board or MDF its is 295mm x 500mm x 18mm.
It has two side bars Mendel is crewed to these side bars at one end so Mendel can be hinged up from the base board to make wiring easier or sort any problems out like flipping a sewing machine up to see its works. The side bars are made from softwood 500mm x 22mm x 14mm softwood. The side bars are screwed and glued to the sides of the board. Then the base board was painted with 30min quick drying black paint. Mendel has left the Kitchen!...


My time was limited today so I built only one stepper controller so not much else was done.

Nopheads suggestion to install the Google tool bar to get a spell checker works great.. thank you.

Wednesday, December 23, 2009

Reducing the number of skate bearings from 32 to 24 or maybe only 20


Some times some thing is stareing you in the face and yet you dont see it.

Well after two weeks I have seen it by taking just a few 5mm spring washers and 6mm spring washers. I have reduced the number of skate bearings required from 32 down to 24 skate bearings a significant saveing.

You could save 4 more by keeping the 3 and 2 bearing configuration of Mendel.

Im lazy and it was easier to just change 1 block per boggie thus mine are all 3 bearing blocks now. Maybe once its all going I will change the Y axis to be a 3 and a 2 configuration.


Here is the method to make both types the three and the two bearing types.

Three bearing boggies.

Here is how you assemble one:

1 nylon corner block in this order.

1 8mm bolt 1 bearing, 1 nut, 1 bearing, 1 washer, Nylon corner block and a nut.

Using two 4mm screw put thru the two holes of 2 bearing block then put an un modified block on the two screws first block now add two 5mm spring washers on to the 4mm screws then add the next block thats made in this order:

1 bearing, 1 nut, 1 washer, Nylon corner block and a nut.

Add the two nuts to hold the new bogie assembly together.

Two bearing boggies.

Here is how you assemble one:

Make 2 nylon corner block in this order.

1 bearing, 1 nut, 1 washer, Nylon corner block and a nut.

Using two 4mm screw put thru the two holes of 1 bearing block now add two 6mm flat washers on to the 4mm screws then put an un modified block on the two screws then two 6mm flat washers folowed by the second 1 bearing block

Add the two nuts to hold the new bogie assembly together.


The 3 bearing seperation is based on the 5mm spring washers bein 1.3mm - 1.4mm when comppresed spring washers are better as it gives you the ability to loosen or tighten the grip of the skate bearings.

The 2 bearing seperation is based on the 6mm spring washers bein 1.4mm - 2mm when comppresed spring washers are better as it gives you the ability to loosen or tighten the grip of the skate bearings.

New image uploaded for  oiaohm to show how the bevel on the skate bearings works to produce the effect of  3 bearings at 120 degrees this effect definatly provides a slider with much less friction than using the four bearings boggies. I do not know the angle of the bevel maybe it is a 60 degree bevel.


Monday, December 21, 2009

The Mendel X Slider and its Skate bearing boggies.

Ok so here is the photo of the X slider made on the Second build day taken apart to add some Skate bearings the red lines show where I need to make some cut outs. I will do this today. after the X slider I need to make a replacement part for the butterfly shaped part that holds the Z Bearings. The Z bearings will just be the Corner block that are alredy fitted on the Z axis sliders.


X carridge finished and fitted.. now to figure out the Butterfly part..


Two hour break ~~~

Back to another bit of Chopping board as Ive run out of 6mm MDF.

Design for the butterfly part on Mendel this is four parts that hold the Z bearings two at each end of the X axis. Design drawn on the chopping board yes too many construction lines I know I pay for this mistake as I drill one hole on the wrong X mark but thru shear luck manage to make use of the extra holes.


Note the two holes closest together is the mistake I drilled one of them on the wrong crosover of lines. Opps.. I do make use of thes holes later thou.


Here is the drilling template for the Z drive nuts the holes are 30mm apart the one closets to the edhe will have a 10mm clearance hole in it on the final 2 parts these are made of Oak floor boards as Im going to use 8mm bolts screwed into a 7.5mm hole in the oak it could be any wood not MDF tho as MDF will split on a peice this small.


First I mounted the two Slider blocks at each end of the cut off triangles. Then held the Oak so it sits imediatly above the center line of the X Endplate drilled 7.5 mm holes through the spare unequal holes into the Oak.

The I screwed the 8mm bolts thru the butterfly plates extra holes into the oak.

I then disasembled the X axis to fitt the Two new parts that hold the Z axis bearings fitted the parts the re assembled Mendel...


The whole of the Mendel frame is now completed...

Jobs for to-morow 1/ Square the Mendel assembly.
2/build stepper driver boards
3 fit belts and stepper motors
4/make a new Extruder to fit Mendel
5/ connct Stepper motors and test X Y and Z axies.


This will be an on going post again.. 21 December 2009

Sunday, December 20, 2009

The Snow today means its another Mendel Day

I was going to move the new 1 Ton bag of gravel from Front to Back today my plan has been Snowed off.

From Blogger Pictures

I have to keep a few little promises for Midge like moving two Darwins out of the Kitchen to the garage and reposoitioning Bertha before Christmas as all four of my girls are due to visit on boxing day. Then its a Mendel day! I will be re-creating a skate bearing carridge for the Y axis as I did with Darwin I think... but first I must do my chores.. An on going post for December 20th 2009.

Having run out of 6mm MDF I have decide to use the small ASDA/Walmart 50p Chopping board 50 as it comes with a big one for £1. In fact the big one is almost Exactly the right width for the Print Bed think I will try this as Its easy to replace.

Struggling with the dimensions of it tho as the one I have Made looks a little small. here are the pictures.


TaDA The Squashed Frog External Dimensions 148mm X 200 when put on Mendel it looks to be not wide enough for the running rails by about 10mm. If you have a Squashed frog alredy please could you confirm these dimensions for me.

Drawing 1


Now we need to adapt the Squashed Frog to run on Skate bearings pictorial record.

On the fly Drawing adaption.


16mm holes drilled to help cut the shapes out.


The new Squashed Frog for Skate bearings.


All of the other holes drilled


Building and fitting the bearing blocks.

Bearing boggies made


Neat little Skate board pics.


All fitted and Slideing great result phew..

About 4-5 hours work including the Bodgeing/design making of the new parts.
3 Squashed frogs one for when I have my printed parts. Also X carridge Drawing and trial assembly of X caridge boggies X carridge next.. followed by the Y sliders and drive.

From Blogger Pictures

Saturday, December 19, 2009

Mendel build Day Two

I spent about 2 hours last night working out the X axis parts on the computer printing stl files out on paper. And using this little application for gaining the external dimensions.


It was good in a way to have break from Mendel last weekend particularly as the ground outside is frozen solid this weekend.

As I have re thought the design. First I will remove the two extra Nylon corner blocks on the bottom bar of the two A frames they are used in a real Mendel.. my lazy / simplified design they are now not required.

I have cut 2 MDF plates 2 off of 150mm x 60mm X 12mm and 2 off of 90mm X 60mm X 12mm for Z axis.


Finding that I did not have along enough belt I found a little draw with some of these Geeenweld gears for the Extruder V1 its a pack of 5 for £1:30.


Screwing one gear through the threded rod hole then positioning other meshing with it. I got the center mark to stick my photo copy of a stepper motor on. Drilling out the tiny hole in one gear to 5mm so I could screw it to the brass hub from Conrad means ~I can fitt it to a stepper.


First I thought I would keep this true to Mendel so I drilled the other two gears out to 8mm big mistake the colar causes the drill to run off center here is the first experimental result.


Making a few diffrent machines ~I also did not have enough 8mm bar but I did have 8mm tube that a 6mm bar fits I used tube on Bertha CNC so I know this works.


So to regain a concentic hole I found 6mm penny washes fited the gear center perfectly one each side of gear removes wobbly gear effect the skate bearings then needed to have a skate bearing insert to reduce the 8mm hole to 6mm great problem solved no need to use belt for Z axis just two cheap steppers.

Final assembly picture


My X axis is about 10mm wider than the printed parts. The Z cartridge is made from 1off 97mm X 84mm x 6mm the 2off X end plates are 62mm x 84mm 6mm.


I have not made proper drawings yet as it was a simple process of positioning the bits and holes to suit I have set the Slider 30mm from the Screw drive on both sides of the Z axis. To maintain the alignment I drilled these holes out using a 2.8mm drill then drilled the bigger holes.


Just a few parts left to make now.. the build base carridge to mount the build base madelast week and the Z axis drive and slider/bearing mounting board.

From Blogger Pictures
Sofar its been about 8 hours today spent building Mendel Im not far short of finishing the whole of the Mendel frame work. next it will be building the electronics fixing belts and testing.

This an ongoing post through out Saturday 19 December pictures to be added.