I am blogging this mainly for my own reference as you generally do not Flash boot Loaders often. As I had to re-learn the whole process again As I had five bootloaders to load.
Previously I grabbed the AVR data sheet to figure out the settings required fuses and lock bits.
This time I found it was easier to use the information stored here:-
X:\Program Files\arduino-0017\hardware\boards.txt
This file is found on any PC that has the Arduino Software installed.
The boards.txt file will look like my slightly modified Boards.txt file:-
##############################################################
extruder1p.name=Extruder1p
extruder1p.upload.protocol=stk500
extruder1p.upload.maximum_size=63488
extruder1p.upload.speed=38400
extruder1p.bootloader.low_fuses=0xFF
extruder1p.bootloader.high_fuses=0xDC
extruder1p.bootloader.extended_fuses=0xFD
extruder1p.bootloader.path=atmega644p
extruder1p.bootloader.file=ATmegaBOOT_644.hex
extruder1p.bootloader.unlock_bits=0x3F
extruder1p.bootloader.lock_bits=0x0F << note reads as CF in AVR studio so needs to be 0xCF.
extruder1p.build.mcu=atmega644p
extruder1p.build.f_cpu=16000000L
extruder1p.build.core=sanguino
extruder1p.verbose=false
##############################################################
extruder1.name=Extruder1
extruder1.upload.protocol=stk500
extruder1.upload.maximum_size=63488
extruder1.upload.speed=38400
extruder1.bootloader.low_fuses=0xFF
extruder1.bootloader.high_fuses=0xDC
extruder1.bootloader.extended_fuses=0xFD
extruder1.bootloader.path=atmega644p
extruder1.bootloader.file=ATmegaBOOT_644.hex
extruder1.bootloader.unlock_bits=0x3F
extruder1.bootloader.lock_bits=0x0F << note reads as CF in AVR studio so needs to be 0xCF.
extruder1.build.mcu=atmega644
extruder1.build.f_cpu=16000000L
extruder1.build.core=sanguino
extruder1.verbose=false
##############################################################
motherboard.name=Motherboard
motherboard.upload.protocol=stk500
motherboard.upload.maximum_size=63488
motherboard.upload.speed=38400
motherboard.bootloader.low_fuses=0xFF
motherboard.bootloader.high_fuses=0xDC
motherboard.bootloader.extended_fuses=0xFD
motherboard.bootloader.path=atmega644p
motherboard.bootloader.file=ATmegaBOOT_644.hex
motherboard.bootloader.unlock_bits=0x3F
motherboard.bootloader.lock_bits=0x0F << note reads as CF in AVR studio so needs to be 0xCF.
motherboard.build.mcu=atmega644
motherboard.build.f_cpu=16000000L
motherboard.build.core=sanguino
motherboard.verbose=false
##############################################################
sanguino.name=Sanguino
sanguino.upload.protocol=stk500
sanguino.upload.maximum_size=63488
sanguino.upload.speed=38400
sanguino.bootloader.low_fuses=0xFF
sanguino.bootloader.high_fuses=0xDC
sanguino.bootloader.extended_fuses=0xFD
sanguino.bootloader.path=atmega644p
sanguino.bootloader.file=ATmegaBOOT_644P.hex
sanguino.bootloader.unlock_bits=0x3F
sanguino.bootloader.lock_bits=0x0F << note reads as CF in AVR studio so needs to be 0xCF.
sanguino.build.mcu=atmega644p
sanguino.build.f_cpu=16000000L
sanguino.build.core=sanguino
sanguino.verbose=false
~~~~~~~~~~~~~~~~~~~~~~~~~~~~~~~~~~~~~~~~~~~~~~~~~~~~~~~~~~~~~~~~~~~~~
This file is a lot longer I am just showing the board details for Extruder1.1, Motherboard1.1 and Sanguino1.1
The Single Sided Audrion board I made here
Is shown above after drilling I ironed on the component outline image to make it easier to build.
My first misshap on testing the boards was one Extruder controller fried a processor due to a bad V regulator that didnt regulate. Cut the Atmega off using a craft knife in a scoring motion accross the pins.
De solderd the offending regulator.
Misshap number two one of the pads for the CPU lifted off in fact typical one of the few that has its connection under the chip.. located the via hole solderd a wire on to the pin BIG mistake should have solderd the via hole end first. as the pin broke off at the plastic to pin join. night mare !! fixed with steady hand and a drop of araldite to prevent any further miss haps.
So 1 Extruder board now has a 168P the others have 168 CPUs.

Back to Flashing bootloaders using AVR studio connecte a board to your programer select the chip icon with AVR on it its a mid screen
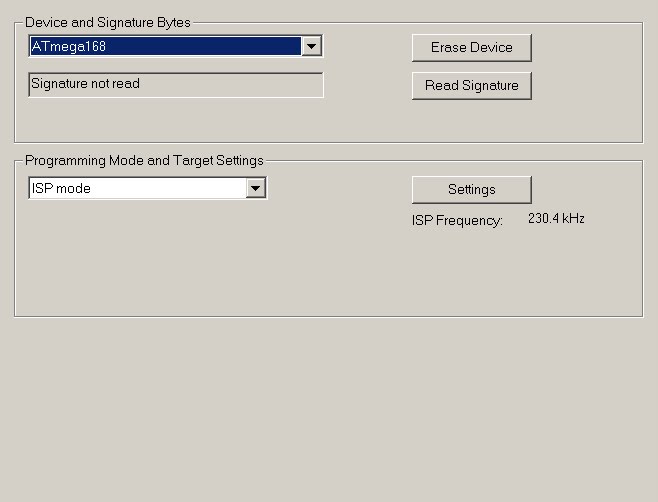
Select read Signature and correct the device name if nesasary and re-read to double check.
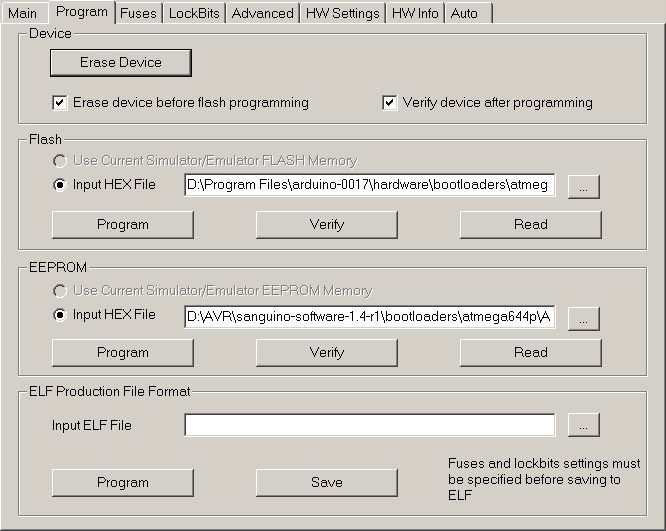
You may now select the program Tab in the Flash section you can select the boot loader file you want on the device and then select the Program button. You now select the Fuses Tab.
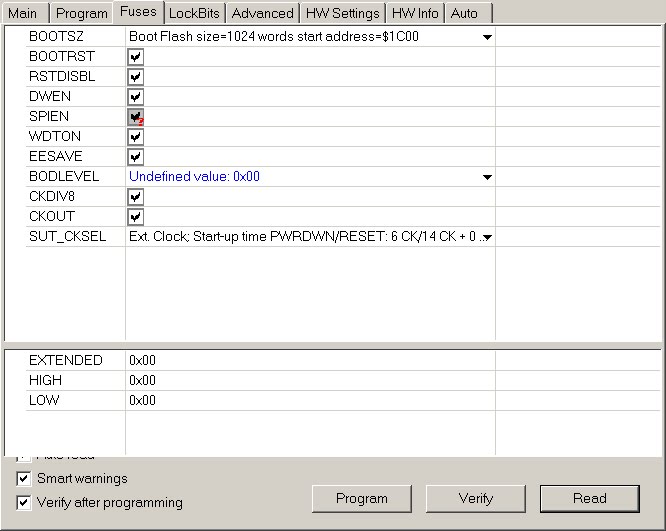
Now using the Settings found in the file Boards.txt for the Extended High and low fuses. Correct the settings by typing in the values for Extended High and low fuses from the file then select program.
Example from flashing the Motherboard 1.1 chip.
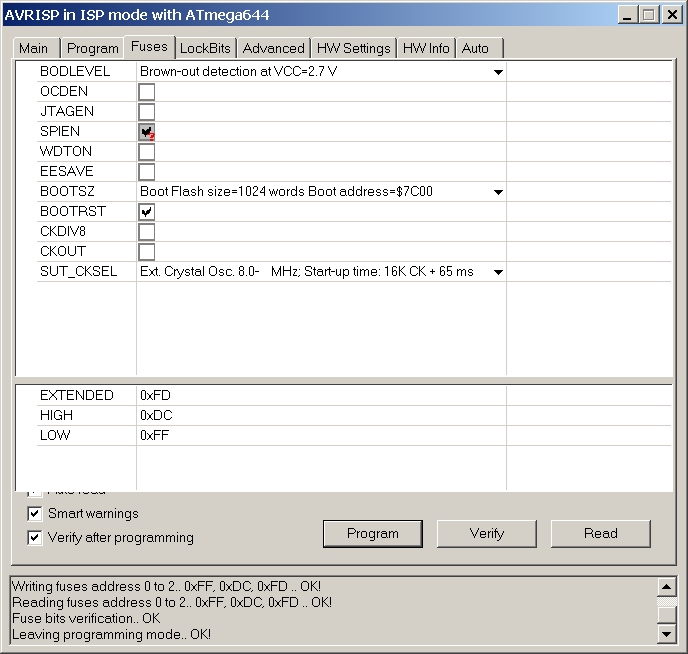
Now select the Lock bits. All you need is the option that locks the boot section from being writen to.
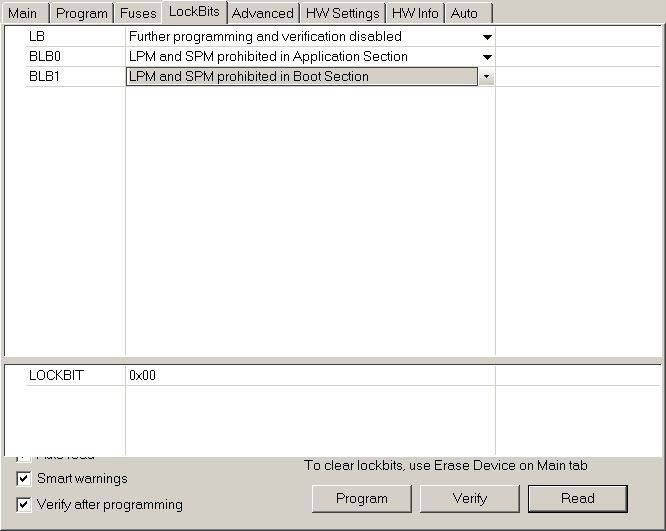
Job Done!!
Please note that some of the Lock bits in the files should be 0xCF not 0x0F the fuse values are read as high for any non existent bits by AVR studio in the boards.txt file they are show as not there. I have adjusted these to be correct for AVR studio in my Boards.txt file.
2 comments:
Hi,
I tried to follow your instructions, however the filenames at the screenshots are unreadable. Can you say exactly what files you used as hex files? Thanks.
The boot loaders were the Sanguino-0018r1_1_4.zip version using the correct hex file for the ATMega Processor on the particular board being flashed.
The RepRap SW that I installed was the reprap-gen3-firmware-1.1.zip as this is the stable version.
The 1.2 and 1.3 versions according to the RepRap forums are not yet stable versions.
Post a Comment